Showing posts with label Dessert. Show all posts

Wednesday, July 27, 2011

Blueberry Tea Cake


I'm back with something sweet to offer my neglected friends.  I took a couple of weeks off to enjoy some summer!  We had lots of fun houseguests, people popping in and out, birthday parties and bonfires...ahhhh, 'twas fun indeed.  I made this cake twice during my time off!  It was so light and fresh tasting, perfect for a summer dessert or afternoon tea.  No one could resist a slice!  It's a simple, homey cake, moist and choc full of fresh blueberries.  It has a hint of lemon and it's slathered with a decadent cream cheese frosting.  Really delightful!


Blueberry Tea Cake
Origin: (slightly adapted) Bill Granger via Leite's Culinaria

Notes:  This cake comes from Aussie chef Bill Granger, who uses terms like "scant" (just short of the prescribed amount) and "heaping" (just a bit more than the prescribed amount), just go with it, his hazy measurements worked for me!  The recipe calls for superfine sugar (not icing sugar), you can easily make your own by placing granulated sugar in a food processor or blender and processing it until finely ground but not powdery.  This recipe yields an uncomplicated 9 x 13, single layer cake.  The cake kept well for at least 4 days, popping leftovers into the fridge when it wasn't being devoured. 

Ingredients:

Cake 
3/4 cup sour cream, heaping 
1/2 teaspoon baking soda 
12 tablespoons unsalted butter, at room temperature, plus more for the baking dish 
1 1/2 cups superfine sugar, heaping
2 teaspoons finely grated lemon zest 
1 teaspoon vanilla extract 
3 large eggs 
2 cups fresh blueberries 
3 cups all-purpose flour, scant 
1 1/2 teaspoons baking powder

Frosting  
8 ounces cream cheese, room temperature (1 block) 
1/2 cup unsalted butter, room temperature 
1 teaspoon finely grated lemon zest 
1 teaspoon vanilla extract 
juice from 1/4 lemon 
16 ounces powdered/icing sugar (I used 4-5 cups, I just kept adding sugar until I got the frosting consistency that I wanted)


Preheat the oven to 350 degrees.  Butter a  9 x 13 inch baking pan and line it with parchment paper, allowing the excess paper to hang over the edge of the pan.

Combine the sour cream and baking soda in a small bowl and let stand for 5 minutes.  In a separate bowl whisk together the flour and baking powder, set aside.  Place the blueberries in a separate bowl and toss with a spoonful of the flour mixture, just to coat the berries.


In a large bowl, beat the butter and sugar with an electric mixer until light and creamy.  Add the lemon zest and vanilla and beat until combined.  Beat in the eggs, 1 at a time, then add the sour cream mixture and beat just until combined.

Add the remaining flour mixture to the wet ingredients and mix just until combined.  Gently fold the flour-coated blueberries into the batter, being mindful not to overmix. 

Spoon the batter into the prepared pan and bake for about 45 minutes, until a toothpick inserted in the center comes out clean. Let cool in the pan for about 10 minutes, then carefully remove the cake to a wire rack to cool completely, either by using the parchment paper as handles or by inverting the cake onto a wire rack and then inverting it again.

When the cake is completely cool, frost with cream cheese frosting.  

To make the frosting, beat all of the ingredients except the sugar with an electric mixer until light and fluffy. Gradually mix in the sugar and beat until smooth. Use immediately.


Thursday, June 23, 2011

White Chocolate Dipped Strawberries with Citrus Sugar


Local strawberries are here!  There is nothing like ripe, juicy strawberries grown close to home.  One of the many delights of summer.  This is an exceptional way to enjoy them, simple and so pretty!  Their juicy goodness still shines through, but the creamy white chocolate and bright citrus sugar are great compliments.


White Chocolate Dipped Strawberries with Citrus Sugar
Origin: Epicurious

Notes:  When melting white chocolate be sure to not let any moisture get into the bowl.  The chocolate will seize up with the addition of the smallest bit of water.  I like these served cold.
 

Ingredients:

2 tablespoons sugar
1/2 teaspoon finely grated orange peel
1/2 teaspoon finely grated lemon peel
6 ounces high quality white chocolate (I used Callebaut), chopped
16 large ripe strawberries

Line a baking sheet with foil. In a small bowl, mix the sugar and citrus zest together with your fingertips until the sugar is moistened.  Set aside.

Melt the white chocolate over a double boiler, (stir the chocolate in small bowl set over a saucepan of barely simmering water) stirring until melted and smooth. Remove from over water.

Holding 1 strawberry by the stem, dip the berry into chocolate, shake excess back into bowl. Turn the berry dipped-end up and sprinkle with citrus sugar, place on prepared sheet.  Repeat with remaining berries, chocolate, and sugar. Chill until chocolate sets, about 30 minutes.


Thursday, February 3, 2011

Lime Squares with Macadamia Nut Crust


Yesterday, amidst Snowpocalypse, I spotted a little bag of macadamia nuts in my pantry.  I immediately had visions of these lime squares.  The snow day got me out of the office a few hours early and I thought I'd better put those hours to good use.  Baking a sunny, tropical treat would fit the bill.  These squares are a regular for me.  The first time I made them was for a friend's baby shower.  My adorable friend took one bite and fell to her pregnant knees on the kitchen floor.  She proclaimed with a groan, "I want these for every baby shower, birthday and special occasion from here on out".  I knew I'd be seeing a lot of these in our future.  And I have.  They've graced my table for brunches, birthdays, tea parties, special dinners and now, snow days. 


Lime Squares with Macadamia Nut Crust
Origin: Adapted from Martha Stewart

Notes:  The original recipe calls for pistachio nuts in the crust which I've done several times and it's great, but there is something about the lime/macadamia nut combo that I just love.

Ingredients:

Crust
4 tablespoons (1/2 stick) unsalted butter, melted and cooled, plus more for pan
2/3 cup macadamia nuts
1 cup graham cracker crumbs
1/4 cup sugar
1 tablespoon grated lime zest (from 2-3 limes)

Filling
2 large egg yolks
1 can (14 ounces) sweetened condensed milk
1/2 cup fresh lime juice (from about 6 limes)

Preheat the oven to 350 degrees. Brush an 8 inch square baking dish with melted butter.  Line the bottom with parchment paper, leaving a 2 inch overhang on two sides.

In a food processor, finely grind macadamia nuts with graham cracker crumbs, sugar, and lime zest. With the food processor running, pour in the butter through the feed tube.  Process until just combined.  The mixture should resemble wet sand and it should hold together when pressed between your fingers.  Press mixture into the prepared pan and work the crust up the sides of the pan to form a 1 inch border.  Bake crust until lightly browned, about 8 to 12 minutes. Cool crust on a rack for 30 minutes.

To make the filling, whisk together the egg yolks and condensed milk in a large bowl. Add lime juice and whisk until smooth. Pour filling into cooled crust and carefully spread to the edges.

Bake until set, about 15 minutes. Cool in pan on a rack and then chill at least 1 hour before serving.

Using the parchment paper overhang, lift out of pan, and transfer to a cutting board. With a serrated knife, cut into 16 squares, wiping your knife clean with a damp kitchen towel between each cut.  Store squares in the refrigerator covered with plastic wrap.


Thursday, January 20, 2011

Peanut Butter Crispy Bars


I'm sorry for posting this in January.  It should be all warming soups and healthy salads over here.  Not carbs laced with sugar, topped with butter, chocolate and peanut butter.  I had (still have) this massive box of Rice Krispies to use up.  It seems like every grocery store only carries the "family size" box, and I got sucked into buying it because I needed 1 cup of Rice Krispies for a recipe I tried a while back.  I can't eat it as cereal, I was never a fan.  It never held up in milk to my slow, savouring eating habits...sog city.  It has many non-cereal uses though, I love the classic Rice Krispy Treats, and my Mother-in-law makes these cute little crispy chocolates for the holidays which are great.  I've also enjoyed Rice Krispies in Sushi...yup, sushi, they add a light, crispy element, kind of like tempura batter to sushi rolls.  And then there is this recipe, a fine specimen for using up my stash of cereal.  This is another great recipe from Matt Lewis and Renato Poliafito, the boys from Baked bakery in Brooklyn.  They are so good at taking regular ol', Granny's kitchen, Mom and Pop, American desserts and making them delicious and fun.  Their cookbooks are so cool, you feel like you are making something new and trendy from just flipping through their pretty pages.  These Peanut Butter Crispy Bars are the customer's favorite refrigerated bar from their popular bakery.


Peanut Butter Crispy Bars
Origin: Baked, New Frontiers in Baking

Notes:  There are 3 layers and 3 steps to making these bars.  Each step is pretty easy on its own, and there is waiting/chilling time in between each layer.  If you give yourself some time and take it step by step, they are really quite simple to prepare.  You need a candy thermometer for the crispy base.

Ingredients:

Crispy Crust
1 3/4 cups crisped rice cereal
1/4 cup sugar
3 tablespoons light corn syrup
3 tablespoons unsalted butter, melted

Milk Chocolate Peanut Butter Layer
5 ounces good quality milk chocolate, coarsely chopped
1 cup creamy peanut butter

Chocolate Icing
3 ounces dark chocolate (60-72% cacao), coarsely chopped
1/2 teaspoon light corn syrup
4 tablespoons unsalted butter (1/2 stick)

To make the crispy crust, grease an 8 inch square baking pan very lightly, using neutral vegetable oil or cooking spray.  Use a paper towel to remove excess oil, set aside.  Put the cereal in a large bowl and set aside.

Combine a 1/4 cup of water, sugar and corn syrup in a small saucepan (be careful to not splash any sugar or syrup onto the sides of the pan).  Bring the mixture to a boil over medium-high heat, stir with a wooden spoon just until combined.  Use a candy thermometer and boil the mixture until it reaches 235 degrees F.

Remove from heat and stir in the butter.  Pour the mixture over the cereal and stir to combine thoroughly.  Pour the cereal mixture into the prepared pan and press into an even layer using your hands or a spatula.  Let the crust cool to room temperature.

To make the chocolate peanut butter layer, using a double boiler, melt the chocolate and peanut butter together, stirring with a rubber spatula until the mixture is smooth.  Remove from heat and stir the mixture for 30 seconds to cool it slightly.  Pour the mixture over the cooled crust and smooth it into an even layer using a spatula.  Put the pan in the refrigerator for 1 hour, or until the top layer is firm.

To make the chocolate icing, using a double boiler, melt the chocolate, corn syrup and butter together, stirring with a rubber spatula until the mixture is smooth.  Remove from heat and stir the mixture for 30 seconds to cool it slightly.  Pour the mixture over the cooled chocolate/peanut butter layer and spread into an even layer using a spatula.  Put the pan into the refrigerator for 1 hour or until the topping is firm.

Cut into squares and serve chilled.  The bars can be stored in the refrigerator, covered tightly for up to 4 days.


Friday, December 31, 2010

Bubbly & Pear Cupcakes


Happy New Year!  I really wanted to wish everyone a happy and healthy 2011, so I baked some cupcakes!  Thank you from the bottom of my heart for tuning in and seeing what's cooking here at Impeccable Taste.  I am having a such great time cooking and creating for this blog!  Now I realize most of you won't get to try my cupcakes, but having this recipe in your arsenal for future use is even better that eating one lousy (but delicious) cupcake.  I have been making these cupcakes for years and they are really divine.  They are a little different, which I love, and they are moist and yummy and so festive.  If you have a reason to celebrate, you have a reason to make these!


Bubbly & Pear Cupcakes
Origin: Yum Sugar

Notes:  You can use any type of sparkling white wine, Prosecco or Champagne for this recipe.  I've used all types over the years from super cheap bottles to more expensive ones as I did this time (because I'm bringing them to a New Year's party).  They always turn out super moist (even if you over bake them a bit like I did this time)I usually make mini cupcakes with this recipe, but I've made regular sized cupcakes with good results too.  I altered the original icing recipe slightly to increase the quantity because I had over 75 mini cupcakes to frost.


Ingredients:

Cupcakes
2 3/4 cups of flour
1 1/2 teaspoons baking soda
1/4 teaspoon salt
1 cup (2 sticks) unsalted butter
2 cups sugar
3 eggs
1 teaspoon pure vanilla extract
3 firm but ripe pears, peeled, cored and grated (I used 5 really small pears, about 2 cups total grated)
1 cup champagne

Frosting
1/4 cup (1/2 stick) butter, softened (1/2 cup butter)
8 oz cream cheese, softened
3 cups powdered sugar (sifted) (4-5 cups)
1/2 teaspoon pure vanilla extract
2 tablespoons champagne (4 tablespoons, just add a spoonful at a time until you get your desired consistency for frosting)

Preheat oven to 350 degrees.

In a small bowl whisk together flour, baking soda and salt. Set aside.

In mixer (or large bowl), cream butter and sugar until lightened and fluffy.  Add eggs, one at a time, making sure each one is full incorporated before adding next.  Slowly add in flour mixture, 1/3 at a time, making sure it is fully incorporated but do not over mix.

Stir in vanilla and champagne.  Stir in pears.

Line a cupcake tin with cupcake liners.  Scoop an even amount of batter into each cup.  Fill to just below the top of the paper cups.

Bake for about 16 minutes (start checking at 12 minutes, the minis took 14 minutes).  They should be done when the cupcakes start to turn golden around the edges.  You can check them by inserting a toothpick into the middle of a cupcake and if it comes out clean with no goop attached, they're done.

Cool in the pan for 2 minutes and then transfer to a wire rack to cool completely before frosting.

Makes 24 regular cupcakes or up to 96 mini cupcakes.

To make the frosting, beat cream cheese and butter together. Add vanilla, sifted powdered sugar and champagne and beat until smooth (add icing sugar and Champagne alternately to desired consistency).

When cupcakes are completely cooled, top with frosting. I also added edible silver dust this time for the occasion.


Monday, December 20, 2010

Sponge Taffy


This is so much fun to make! I felt like a mad scientist in the kitchen, and the result of my experiment was so delicious!  I always loved sponge taffy as a kid and never dreamed I could whip this up in my kitchen in a matter of minutes.  It's pretty, it has a satisfying candy crunch and the deeply sweet bubbles melt in your mouth.  I like to take it a step further, and coat big, bite-fulls of sponge taffy in luscious milk chocolate.  Crunchie bar anyone?  It's almost an exact replica.  I used the small shards that remained after breaking up the sponge taffy, to create a yummy, and oh so pretty, golden flecked chocolate bark.


Sponge Taffy
Origin: Unknown

Notes:  You need a candy thermometer to make this recipe. The instructions say to boil the sugars to 300 degrees. When mine reached 300 degrees, it was only just starting to turn golden. I let it go for another 30-60 seconds until I saw that nice golden colour.
Have your baking soda ready and your pan prepared and close by, and get that hot candy out of the pot as quickly as you can, to prevent over cooking.
I have successfully doubled this recipe (from quantites listed below) and it makes enough to fill an entire baking sheet (18 x 26 inches).

Ingredients:

1 cup granulated sugar
1 cup light/white corn syrup
1 tablespoon white vinegar
1 tablespoon baking soda

Butter a baking sheet and set aside. Measure the baking soda and set aside.

Bring sugar, corn syrup and vinegar to a boil over medium-high heat, stirring to dissolve the sugar.  Continue to boil until the mixture reaches 300 degrees F.  If the mixture is still clear, continue to cook until the mixture starts to turn a golden colour (see notes above).  Immediately remove from heat and stir in the baking soda, mix well. The mixture will expand and bubble up.  Quickly and carefully pour the mixture into the prepared pan.

Let cool and break into pieces.


Chocolate Covered Sponge Taffy

Ingredients:

1 batch of  prepared sponge taffy, broken into bite sized pieces
2 cups good quality milk chocolate chips (I used Callebaut)

Melt chocolate chips using a double boiler.  Stir chocolate until smooth and completely melted.  Turn off heat, but keep the bowl of chocolate over the hot pot to help maintain the smooth melted texture while working.

Drop chunks of sponge taffy into the chocolate.  Using two forks, turn the taffy to coat and then tap off excess chocolate on the side of the bowl.  Transfer pieces to a baking sheet covered in parchment paper to cool and set.

Sponge Taffy Chocolate Bark

Ingredients:

1 1/2 cups small, broken pieces of sponge taffy
2 cups good quality milk chocolate chips

Melt chocolate chips using a double boiler.  Stir chocolate until smooth and completely melted. 

Pour chocolate onto a baking sheet lined with parchment paper.  Scatter sponge taffy pieces and press them very lightly into the chocolate to adhere.

Transfer the tray to the fridge to cool for 45-60 minutes.  Break into pieces and serve slightly chilled.

Friday, December 17, 2010

Toblerone Shortbread Cookies


Do you have time to squeeze in a little more baking before the holidays?  I'd like to nominate these cookies for the spot, if you do.  These cookies are crispy, crumbly, buttery, not too sweet and oh so tasty!  Somehow they manage to seem as light as air even though they contain a pound of butter.  Yikes, I just put that out there eh!?  I was trying to hold back that information until I convinced you to make them...y'know let you figure it out on your own.  But it's the holidays, and you are obviously making them for guests right?  So don't you worry about it.  These are super, duper delicioso and so easy to make!


Toblerone Shortbread Cookies
Origin: Unknown

Notes:  I use a grocery store brand "Swiss Milk Chocolate with Honey Almond Nougat" in place of the expensive Toblerone bars.  No one ever knows the difference.

Ingredients:

2 cups butter, softened
1 cup fine granulated sugar
3 1/2 cups all purpose flour
1/2 cup cornstarch
300g Toblerone style chocolate, roughly chopped
3 tablespoons icing sugar, sifted

Preheat the oven to 350 degrees.

In the bowl of an stand mixer fitted with the paddle attachment (or in a large bowl with a hand held electric mixer), beat the butter and sugar until light and fluffy.

In a separate bowl, whisk together the flour and cornstarch.  Slowly add to the butter mixture, beat until just combined.  Stir or fold in the chocolate chunks.

Drop heaping tablespoons of batter onto an ungreased baking sheet or one lined with parchment paper.  Bake for 20-25 minutes, or until the cookies are just beginning to brown.

Cool cookies on baking sheet for a couple of minutes.  Dust the tops of the cookies with icing sugar and transfer them to a cooling rack to cool completely.


Monday, December 6, 2010

Flourless Chocolate Walnut Cookies


I baked cookies all weekend.  Tons o' cookies.  I was training, hardcore, for our first annual office cookie competition.  I had scouted recipes for weeks and picked a couple I thought would be original and tasty.  You see, my coworkers get cookies from me all the time.  Some of my finest work has been distributed through those halls.  I had to up the ante for the competition.  So I baked all weekend.  And today, competition day.  I am giving you a cookie recipe that my coworkers enjoyed weeks ago, because it tops anything I cranked out this weekend.  Boooooo.
I'll fill you in soon as to how the competition went down, what cookie recipe I submitted and how it fared.  But for now, here is an awesome cookie recipe that my coworkers delighted in, in the off season.
This is my slightly tweaked version of a famous cookie recipe that has been floating around the blogosphere for a couple of years now. It is a simple recipe with simple ingredients but the results are outstanding.  And these happen to contain no flour or dairy so they are a great option for people with those allergies.
Simple, allergy friendly, delicious, original...I wish I had known about this cookie competion before I busted out these big guns.


Flourless Chocolate Walnut Cookies

Notes:  These are simple to make but you must follow the directions properly.  The key is to prepare all your egg whites, but only use as much as you need.  Pour in a little at a time until you have what seems like a thick brownie batter.  You should be able to scoop up the batter and not have it be drippy.  I altered the recipe  slightly because I wanted the final product to be large and chunky, instead of flat puddles, (they are sometimes known as puddle cookies).  I leave my walnuts whole (halves) and I beat the egg whites with a hand mixer just for a minute to add some volume to the whites.  This creates a chewy, gooey mound of cookie with big bites of walnut.  It's divine!

Ingredients:

2 3/4 cups walnut halves
3 cups confectioners sugar (icing sugar)
1/2 cup plus 3 tablespoons unsweetened good quality cocoa powder
1/4 teaspoon salt
4 large egg whites, at room temperature, whisked vigorously or beaten for 1 minute
1 tablespoon pure vanilla extract

Preheat oven to 350 degrees. 

Spread the walnut halves on a baking sheet and toast in the oven for about 9 minutes, until they are golden and fragrant. Let cool.

Position two racks in the upper and lower thirds of the oven and lower temperature to 320. Line two large-rimmed baking sheets with parchment paper.  Lightly grease parchment paper with a neutral flavoured oil or a bit of butter.

In a large bowl, whisk (or combine in an electric mixer on low speed) the icing sugar with the cocoa powder and salt followed by the walnuts.

While whisking (or beating with electric mixer on  medium speed), add the egg whites and vanilla extract and beat just until the batter is moistened (do not overbeat or it will stiffen).  Only add enough egg whites to form a thick batter coating the walnuts.  It won't look like a lot of batter but just trust.

Spoon the walnuts/batter onto the baking sheets in 12 evenly spaced mounds, and bake for 14 to 16 minutes, until the tops are glossy and lightly cracked, shift the pans from front to back and top to bottom halfway through to ensure even baking.

Slide the parchment paper (with the cookies) onto 2 wire racks. Let cookies cool completely, and store in an airtight container for up to 3 days.

Monday, November 29, 2010

Molasses Spice Cookies with Orange Sugar


With the holidays approaching, I'm sure all the bakers out there are preparing their lists for holiday baking (some die-hards have probably started baking already).  I'd wager that if you are baking for the holidays, there has got to be some kind of gingerbread/molasses/spice concoction on your list.  It's a holiday classic.  But how about stepping those up a notch...adding even more seasonal holiday flavour!?  These simple molasses spice cookies become extraordinary with the addition of a sparkling, crunchy, orange infused sugar topping.  The orange flavour compliments the spice cookies perfectly, and the glistening sugar topping elevates these cookies to holiday cookie platter star.  I love a good twist on an old classic.


Molasses Spice Cookies with Orange Sugar
Origin: The Kitchn

Notes:  You can use a faithful gingerbread or spice cookie that you love and just try the topping.  It's so easy and it makes them really special.

Ingredients:

1/2 cup unsalted butter
1/2 cup light brown sugar
1 egg
1/4 cup molasses
1 teaspoon pure vanilla extract
1 3/4 cups unbleached all-purpose flour
1/2 teaspoon baking soda
1/2 teaspoon kosher salt
1 1/4 teaspoon ground cinnamon
1/4 teaspoon ground nutmeg
1/4 teaspoon ground ginger
1/8 teaspoon ground cloves
1/8 teaspoon freshly ground black pepper
1 orange, zested
1/3 cup turbinado sugar

In a large bowl, whisk together the flour, baking soda, salt and spices, set aside.

In the bowl of an electric mixer, cream together the butter and brown sugar until light and fluffy. Add in the egg, mixing just to combine. Stir in the molasses and vanilla extract.

Fold the flour mixture into the butter mixture, until just combined.

Separate the dough into 2 portions (it should be quite sticky) and place each half on a sheet of plastic wrap. Cover with another sheet of plastic wrap and, using a rolling pin, roll out the dough to 1/4 inch thick. Chill until firm, at least 2 hours or overnight.

Meanwhile, stir together orange zest and turbinado sugar.

When ready to bake, preheat oven to 350 degrees.

Remove dough from fridge.  Working in batches, cut out cookies into desired shapes.   I found the dough softened so quickly that I couldn't transfer the cutouts to the baking sheet without smooshing them.  I placed my rolled dough with plastic wrap onto a large cutting board and then cut out my shapes.  I transferred the whole cutting board to the freezer for a couple of minutes to let the shapes firm up again.  When firm, they easily pulled away from the dough scraps to transfer to the baking sheet.  Keep unused dough chilled.

Sprinkle with orange sugar topping.  Bake for 8-10 minutes until cookies are firm around the edges and set in the middle.  Cool on the sheet pan for 5 minutes, then transfer to a cooling rack to cool completely.


Tuesday, November 23, 2010

Pear and Cardamom Upside Down Cake


My girlfriends and I made this cake for an Indian themed, ladies only dinner party.  I am a major Indian food fan (and boy, did we feast well on dinner), however I have never been able to get into traditional Indian desserts.  Gulab Jamun anyone??  I just can't.  I do love Chai tea though, and it was on the menu.   I chose this cake as one of our dessert options because I thought the cardamom was reminiscent of those beautiful Indian flavours, it would go nicely with our Chai tea, and the fall pears were booming.  It's not a showstopper of a cake, it's kind of casual in a brown and mushy, snack cake sort of way.  But the flavour and light, fluffy, moist texture, more than compensates for it's lack of visual appeal. 


Pear and Cardamom Upside Down Cake

Notes:  I've made this cake a few times, once without a stand mixer. With a wooden spoon, taking turns around the room, beating with some serious elbow grease, we got the butter nice and fluffy and the cake turned out great.

Ingredients:
1 1/2 cups flour
1/4 teaspoon salt
2 teaspoons baking powder
1/2 teaspoon freshly ground cardamom (from about 6 to 8 pods) (I used pre-ground cardamom)
3/4 cup (1 1/2 sticks) butter, room temperature, divided
3/4 cup packed golden brown sugar
2 firm-ripe Anjou pears (I used Bartlett)
1 tablespoon lemon juice
3/4 cup sugar
2 eggs, room temperature
1 teaspoon vanilla extract
1/2 cup milk, room temperature 

Heat the oven to 350 degrees.  Generously butter a 9 x 1 1/2 inch round cake pan.

Sift the flour, salt and baking powder together. Stir in the cardamom and set aside.

Melt 1/4 cup butter in a small saucepan over medium heat. Add the brown sugar and stir for 2 to 3 minutes, until the sugar has melted and combined with the butter. Pour the mixture into the prepared cake pan, spreading it to reach the sides.

Peel the pears, cut them in half and remove the core and stem. Cut each half into 1/4 inch thick slices. Arrange the pear slices in a slightly overlapping circle around the cake pan, starting at the outer rim. Finish with several slices in the center. Sprinkle the pears with the lemon juice. Cover with plastic wrap and set aside.

Beat the remaining 1/2 cup butter in the bowl of an electric mixer fitted with the paddle attachment, until soft and fluffy. Add the sugar and beat until smooth. Add the eggs one at a time, beating after each addition. Beat in the vanilla, scraping down the sides of the bowl when needed. Alternately add the flour mixture and the milk, starting and ending with the dry ingredients. Beat after each addition just until combined.

Gently spoon the cake batter on top of the pears, smoothing out to the edge of the pan and making sure the cake batter fills in around the pears.

Bake until the top is a deep golden brown and a skewer inserted in the center comes out clean, about 40 minutes. Place the cake on a rack to cool for 5 minutes in the pan.

Run a small spatula or knife around the edge of the pan and invert onto a cake plate, leaving the pan on the cake for 10 minutes. Carefully remove the pan. Serve warm or at room temperature.


Thursday, November 18, 2010

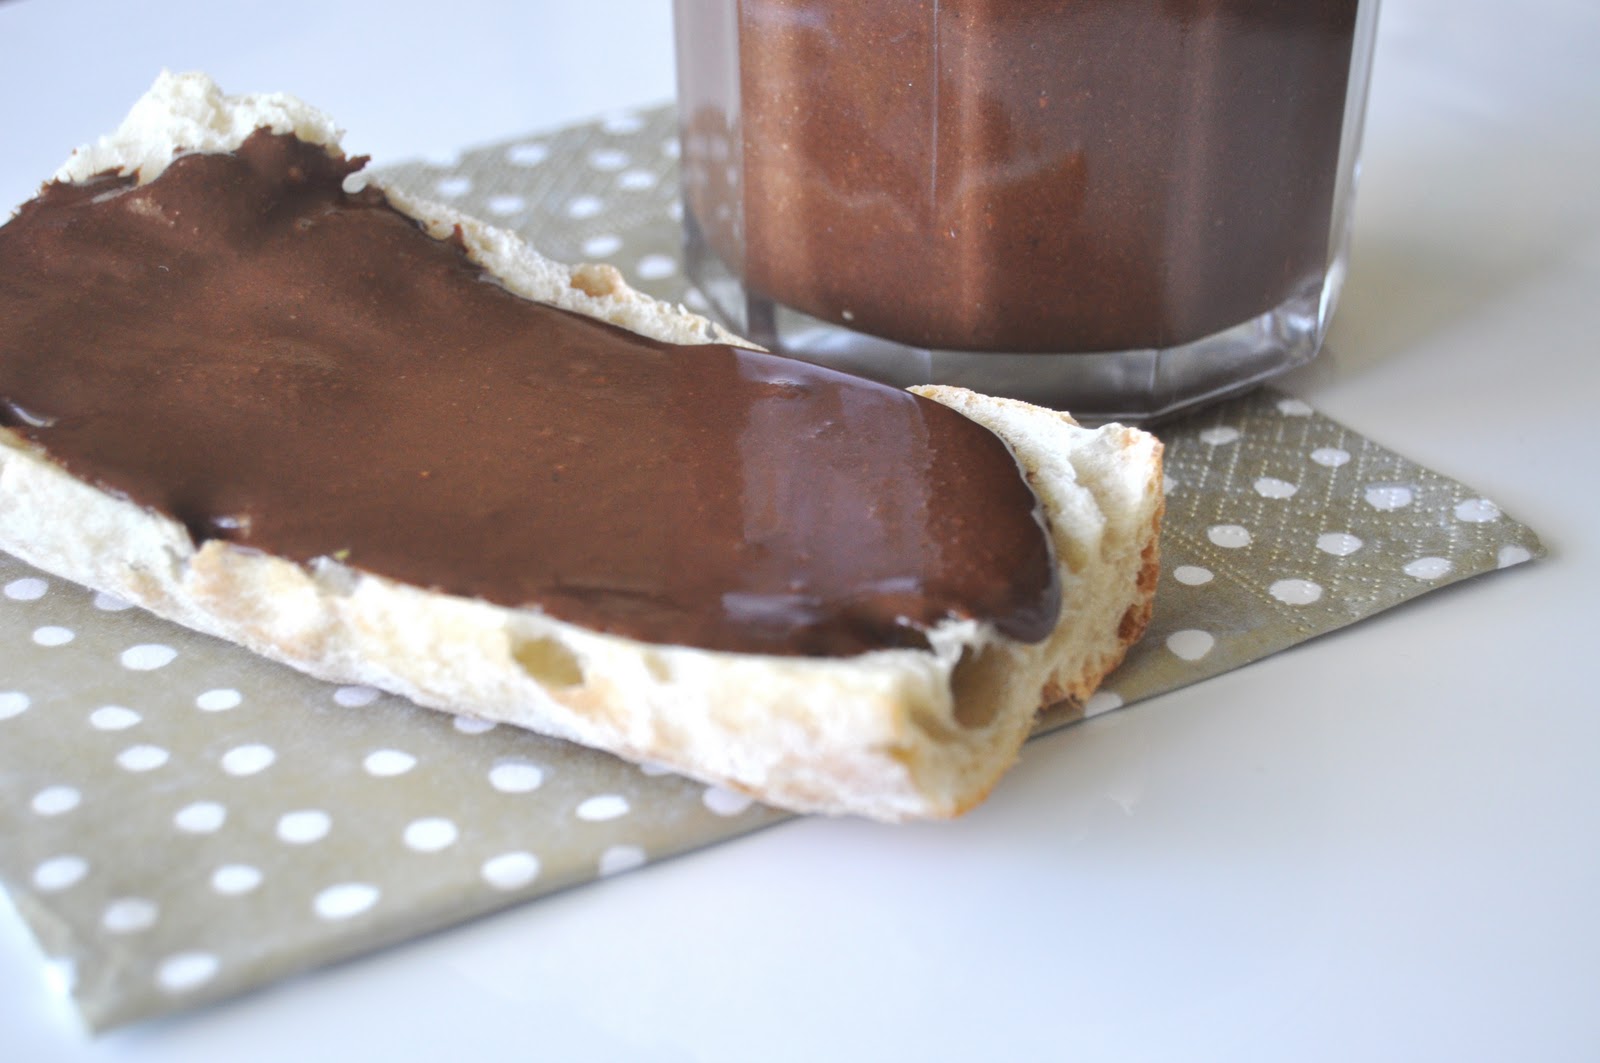
Superior Sandwich: Homemade Nutella


So, those Nutella Scones got me thinking...as much as I looove Nutella, I have always been concerned by the quantity and choice of oil used in the product.  The label used to list hydrogenated vegetable oil as the second ingredient.  I believe over the last little while they've changed that to palm oil, which I suppose is great progress.  But still, there is more oil than hazelnuts in that little jar.  I couldn't help but think that homemade is always best and I knew I could do better.  Boy, did I, and with hazelnuts proudly featured as the first ingredient.  Nutty, chocolaty, sweet bliss.  I better not make a habit out of this.


Homemade Nutella
Origin: Impeccable Taste by Jaime

Notes:  The only down side to this recipe (besides its habit forming properties) is that hazelnuts cost a fortune, so get ready for sticker shock when you hit the checkout with your bag of nuts.  I was not able to achieve the ultra smooth consistency of the original Nutella, it was a tad grainy but the fresh flavour more than makes up for that.

Ingredients:

2 cups hazelnuts
1 1/2 cups icing sugar (powdered sugar)
1/2 cup good quality unsweetened cocoa powder
1/2 teaspoon salt
1 tablespoon pure vanilla extract
1/4 cup coconut oil, warmed/melted

Heat oven to 350 degrees.

Place hazelnuts on a baking sheet and toast in the oven for 7-10 minutes, or until they become fragrant.  Place toasted hazelnuts in a clean tea towel and rub the skins off as much as you can.  (I spent waaaay too long trying to get perfectly naked hazelnuts, they are very stubborn, just try your best and move on.)

Place cooled hazelnuts in the bowl of a food processor.  Process until smooth.  The hazelnuts will go through phases while processing.  They will become chopped, then they will all clump together, keep going...eventually the heat generated from the friction of the processor will loosen the ground nuts.  Keep processing until you achieve a smooth paste.

Add the icing sugar, cocoa powder, salt and vanilla, process until combined.

With the processor on, slowly drizzle the liquid coconut oil through the feed hole.  Process until smooth.


Friday, November 12, 2010

Nutella Scones


These are good my friends.  Really good.  Lovely, crumbly scone texture, bites of crunchy hazelnuts with a pure Nutella ribbon running through them - and of course a little on top too.  This recipe came from one of my newest cookbook obsessions, Baked Explorations: Classic American Desserts Reinvented.  This is the second fabulous baking cookbook from authors, Matt Lewis and Renato Poliafito who are owners of a famous Brooklyn Bakery called Baked.  They provide a fresh, hip, kinda retro take on baked goods with spectacular results.  This recipe was the first (of many) that called out to me.  Must. Make. Nutella. Scones. Right. Away.  I made 2 batches of these, I baked 4 scones right away to taste, and flash froze the rest of the dough to bake at a later time (see note below).


Nutella Scones
Origin: Baked Explorations: Classic American Desserts Reinvented

Notes:
On Freezing:  Scones freeze beautifully.  Freeze individual portions of uncooked dough by placing the uncooked scones, in a single layer, spaced apart, on a baking sheet in the freezer for about an hour.  Once frozen they can be packaged together and wrapped well for longer term freezing.  When ready to bake your scones, place frozen scones on a baking sheet lined with parchment paper and bake from frozen, adding a couple of minutes to the original baking time.
On Baking:  The key to producing good scones is to work with cold ingredients and to not handle the dough too much.  Read over the recipe until you are sure of what you are doing and then work through the recipe quickly.  As soon as the dough comes together, stop kneading.
On Ingredients:  Good quality, dark cocoa powder adds huge flavour to your baked goods. Try seeking out a decadent brand such as Valrhona or Callebaut at a specialty food shop.

Ingredients:
2 cups unbleached all purpose flour
1/4 cup granulated sugar
1/4 cup dark unsweetened cocoa powder
1 tablespoon baking powder
1/2 teaspoon salt
6 tablespoons (3/4 stick) unsalted butter, cold, cut into cubes
1 large egg
1/2 cup heavy cream
3/4 cup hazelnuts, toasted, coarsely chopped
1/2 cup Nutella

Preheat oven to 375 degrees with a rack in the center position.  Line a baking sheet with parchment paper.

In a large bowl, whisk the flour, sugar, cocoa powder, baking powder and salt together until combined.  Add the pieces of butter and use your fingers or a pastry blender (my preferred method) to work the butter into the flour until you have pea sized pieces of butter and the mixture resembles coarse meal.

In a separate bowl mix together the egg and cream.  Slowly pour these wet ingredients into the dry ingredients and stir until it starts to come together.  Turn dough out onto a clean surface and add the hazelnuts, briefly knead the mixture so that the hazelnuts are mixed throughout and the dough comes together.  Flatten the dough into a rectangle about 6 x 12 inches.  Spread 1/4 cup of Nutella in a "X" pattern across the dough.  Roll the dough up into a cylinder, turn it on it's end and flatten in into a disc about 1 3/4 inches thick.  Do not overwork the dough.

Cut the disc of dough into 6 or 8 wedges (I cut them even smaller for a brunch) and place them on to the prepared baking sheet.  Bake the scones for 18-20 minutes (15-18 minutes if smaller and 20-22 minutes if frozen), rotate the baking sheet halfway through.  The scones are done when a toothpick inserted in the middle comes out clean.  Do not overbake.

Transfer scones to a wire rack to cool completely.  Place the baking sheet with the parchment on it, underneath the cooling rack for the next step.

Heat remaining Nutella in a small saucepan until pourable.  Use a spoon (or two spoons) to pour/drip the Nutella in a zig zag pattern across the top of the scones.  Alternatively, place the Nutella in a small resealable plastic bag and warm in the microwave for 10-20 seconds (watch it carefully), then snip a small whole in the corner of the bag and squeeze Nutella onto the scones.

These are best eaten the day they are baked, but they will still taste good the next day if they are wrapped up overnight.  See freezing note above to save scones for a later date.


Friday, October 29, 2010

Monster Cookies


Quick!  There is only 2 days left until Halloween and you have to make these cookies!  Halloween is the best excuse to make these peanuty, oatmealy, chocolatey, Monster Cookies...all 5 dozen of them.  Yup, 5 dozen delicious, holiday appropriate cookies.  They are just begging to be made and given away to friends and Halloween drop-ins.  These cookies have very little flour, they are all about the mingling of peanut butter and oatmeal.  You can customize them with whatever treats you want to add in, nuts or m&ms are popular additions.  This mix of chocolate chips and Reece's Pieces is scrumptious, and perfect for Halloween.


Monster Cookies
Origin: Unknown

Notes:  Hurry up and get started...these cookies need to rest in the fridge for at least 5 hours!  I think it's to help soften the loads of oatmeal in them.

Ingredients:

5 3/4 cups old-fashioned rolled oats
1/2 cup all-purpose flour
1 tablespoon baking soda
1/4 teaspoon salt
3/4 cup unsalted butter
1 1/2 cups firmly packed light brown sugar
1 1/2 cups granulated sugar
5 large eggs
1/4 teaspoon light corn syrup
1/4 teaspoon pure vanilla extract
2 cups creamy peanut butter (not natural)
1 cup semisweet chocolate chips
1 cup Reese's Pieces

In a large bowl, whisk together the oats, flour, baking soda and salt until combined.

In the bowl of an electric mixer fitted with the paddle attachment (I'm sure a bowl and a hand mixer will work for this), cream the butter until smooth and pale in color (a few minutes). Beat in the sugars on low speed until incorporated. 

Add the eggs, one at a time, beating and scraping down the sides of the bowl between additions.  Add the corn syrup and vanilla and beat just until combined. Add the peanut butter and beat on low just until smooth. Add the dry ingredients a little at a time (in three additions) on low speed until combined.  Fold in the chocolate chips and Reese's Pieces by hand. Cover the bowl tightly and refrigerate for at least 5 hours (I left it overnight).

When you are ready to bake your cookies, preheat the oven to 375 degrees and place a rack in the middle position.  Line a baking sheet with parchment paper or a silicone baking mat. 

Scoop the dough with a small  ice cream scoop (about 2 tablespoons worth) and place them on the prepared baking sheet, spacing them about 2 inches apart.  Bake for 12 to 15 minutes, or until they begin to brown.  Rotate the baking sheet halfway through baking.  (I baked 2 trays worth of cookies at a time on 2 oven racks - one in the upper third of the oven and one in the lower third.  My cookies took about 16 minutes to bake when I did this.  Make sure you alternate racks and rotate the baking trays halfway through baking.)


Cool cookies in their pan for 8 to 10 minutes, then transfer them to a wire rack to cool completely. Store in an airtight container for up to 5 days.

Makes 5 dozen cookies.